Thursday, February 2, 2012

Handmade


This Thursday, I'm thankful for my ability to create things. I'm even more thankful that I'm able to share this gift with my girls (and that they humor me, most of the time).

Some of our projects from the past year -


The girls made Valentine's cards with sponge stamps. 


C's Toy Story birthday cake with cake stand. 


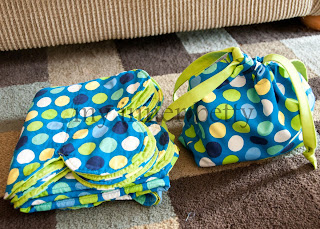
scalloped edge baby quilt and tie-top bag for my BFF's new baby boy


peach preserves - my first (on my own) canning experience


A's scrapbooking bag - She also attended her first crop this past fall! 


 This fantastic little cabinet was orange and yellow - really bright orange and yellow - before I got a hold of it. We saw it at Goodwill one Saturday morning, and I knew it would fit that little space perfectly! I left Adam at Goodwill with the instructions to guard it with his life while I ran home to measure the space. Thankfully he humored me, but told me no way was it going in our dining room in its fabulously circus-colored state. :) 


crayon wreath with A as a back-to-school project 


C's elephant costume!


A's horse birthday cake - it was made using the same pan my mom used for many of my birthday cakes! 


A's doll bed (an A & Adam project) and the bedding
plans for the bed here 


Christmas crafts with the girls


Possibly my favorite - this tree wall hanging. It was a Christmas gift for my mom made with fabric that had my been grandma's (her mom). Those leaves - that same fabric was her kitchen curtains. 

Wednesday, February 1, 2012

Moving Day!!

Oh no, not for me. We moved 3 times in the first 3 years of A’s life, and my desire to pack up and do it all over again right now is about zero.

I’m talking about Little Sister! She’s moving into her first apartment!! Exciting! Hopefully everything goes smoothly for her!

Unlike this furniture moving adventure we had 9 years ago.

(Excuse the cell pic of the photo. This was taken waaaaaaaay back in 2003, 
before everyone and their brother had a digital camera.)

We drove a mile like this – with Little Sister holding the door closed while practically sitting inside the bookcase in the backseat of my '93 Escort. 

Looking back, it probably would have been easier to put the back seats down and load it in the trunk. Maybe we even thought about that, but nixed the idea because that would have involved cleaning out my trunk. YIKES! And really, doing things the "normal" way has never been my strong suit! 

Tuesday, January 31, 2012

Christmas Crafting - Round 3


Ear warmers!!

I actually made a total of 5 of these over the weekend. 2 as Christmas gifts, 1 for myself, and 1 for each of my girls. (I'm not posting the Christmas ones just in case the intended recipients read my blog. I'm pretty sure they don't even know it exists, but ya never know... :) )  I got my pattern from Petals to Picots, and it worked up so nicely! The headband part only took about 30 minutes total. The flower was a little tricky in the beginning, but by my second one, I was able to make one in 20 minutes or so. 


A was so excited to wear her new ear warmer - even though it was 55* yesterday. :) She picked the yarn out herself at Rapunzel's in Frankenmuth this past summer when we were on vacation. The two of us could have spent hours in there. They have so many beautiful yarns and unique buttons! 


Linked at:

Monday, January 30, 2012

Shabby Heart Valentine's Day Shirt!

My big kid LOVES holidays. They're all special to her for unique reasons. Why does she love Valentine's Day? The pinks, reds, hearts, and love! So, she needs a special shirt for the special day, right? Of course!! (If we're being totally honest here, I love holidays too!)

Last year I made her a cut-out heart shirt and matching skirt. This year, I wanted to do a little something different. Plus, I'm still on my applique kick from the pillowcases. :)

I saw this adorable giraffe shirt here and knew that was going to be my technique this year!! Super easy and so fun!

My awesome husband came across some extra plain colored long sleeved T's while organizing the girls closet (that's a Daddy job around here, ya know? :) ), and I had a bunch of leftover fabric bits from my craft show projects... It's like this little shirt was really meant to be!


This is my first real tutorial. I'm waaaay better at talking than writing, so hopefully this is easy enough to follow. :)

To start out, you'll need a shirt (got mine from ON when they do all their crazy clearance sales at the end of the season), a pattern, fabric, fusible webbing (I used Heat & Bond), thread, sharp scissors, a ruler, a sewing machine, an iron, and a pencil.


You’ll want to lay your pattern onto your base fabric (the light pink and white striped here) to determine the size of your fabric pieces. I like to have some extra to work with, so I cut my fabric pieces a good amount larger than my pattern. 


Determine how far apart you want your stitch lines to be and draw them on the back of your base piece. Ultimately, I went with 1/2 inch increments. 


Stack your fabric pieces and pin them like there's no tomorrow!


 Now stitch along all of the lines you just drew.


(I didn't go the whole way to the edges of my fabric - just as little larger than my pattern.)


Next up - cutting! You're going to cut through the top 4 layers of fabric. DO NOT cut your base fabric! Start at one edge and work your way across.


When you're done, it should look something like this -


Now we need to apply the webbing. Trace your pattern (remember to reverse it if it's directional) onto the smooth side (paper side) of the webbing. 


Then iron it onto the back of your base fabric. 


Cut it out, peel the paper backing off, and determine the placement on your shirt. Iron it in place.


Carefully zigzag stitch around the outer edge of the heart. 


In order to achieve the shabby look, you need to wash and dry the shirt a few times. 


before


after


See how the edges are starting curl up so nicely? Another round or two in the washer, and it should be fabulous! 


Linked at: 


Thursday, January 26, 2012

Grandma!

One of my goals for 2012 was to make a thankful journal smash book style (thanks Jenny!!). I made it…kind of…and haven’t written in it since the 3rd or 5th of January. Not really shocking for me. I don’t think my brain works that way. I scribble stuff down in the journal of randomness that I keep beside my bed (you know, for all those thoughts that plague me while I’m trying to fall asleep. My brain seems to go into overdrive at that point in the day for some bizarre reason…probably because the house is finally quiet…anyway), but I’m really bad at doing it daily. I think (hope!!) “Thankful Thursday” will be a good fit for me.

*~*~*~*~*~*~*~*~*~*~*~*~*~*~*~*~*~*~*~*~*~*~*~*~*~*~*~*~*~*~*~*~*~*~*~*~*~*~*

Today, I am thankful for my Grandma H. At 87, she’s my only living grandparent. I deeply cherish our weekly phone chats. We usually talk a lot about the weather, my girls, and the crops, but lately, she’s been telling me more stories of my dad, aunts & uncle, and her own childhood. I love hearing about those memories and learning more of my family history. 


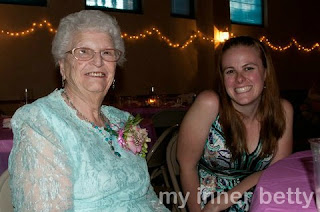
Grandma & me at my aunt's wedding last summer


I'm especially thankful that my girls have had the chance to know her and spend time with her. 

Grandma & A


Grandma & C


During our summer trip to Michigan (where I was born and where most of my family still lives) 2 years ago, we loaded up Adam's laptop and our scanner, and I spent two days in Grandma's living room scanning old photos (some from the 1890's!!) and hearing the stories. It was hands down, one of my favorite trips ever! 

Just a few of my favorites - 

me, Grandma, my cousin


my grandparents on their wedding day


They were married during WWII when many things were rationed - including fabric, so they had to make due with what they had - thus no fancy white dress. :)


Love!